Twenty-One Queen Cells Richer

A quick update about the current set of results. The hive that has the queen cups-only frame has queen cells, but the bees also started drawing comb between the cups. (And the queen was laying in them.) That tells me that they now want worker brood and not queen brood, so I released her back into the hive, to rebuild the population. I strongly suspect that this hive is no longer primed to swarm.

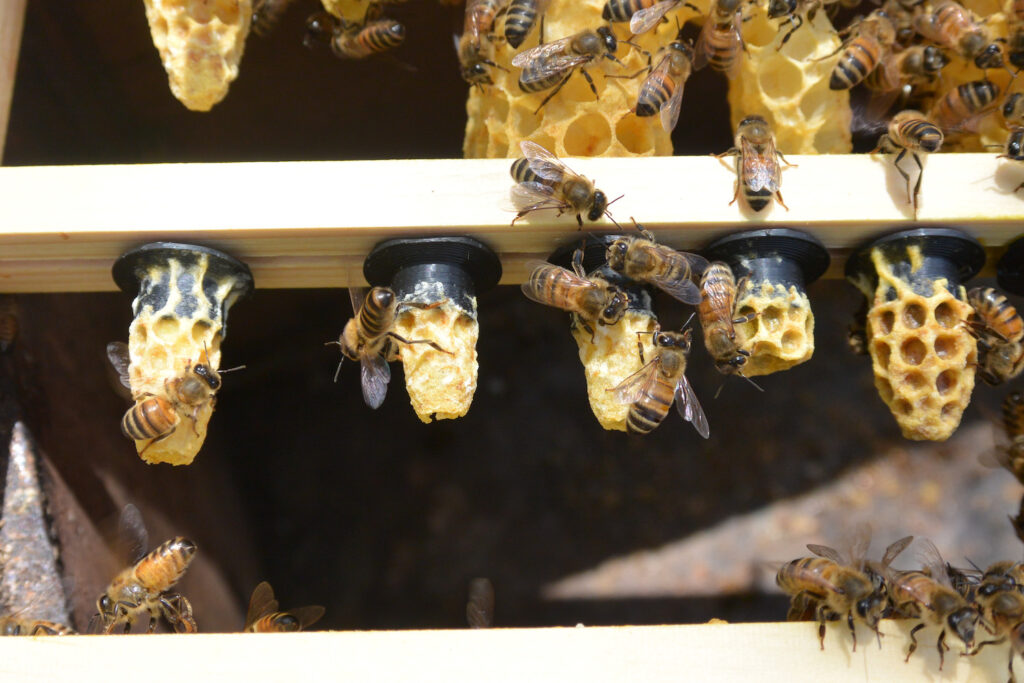
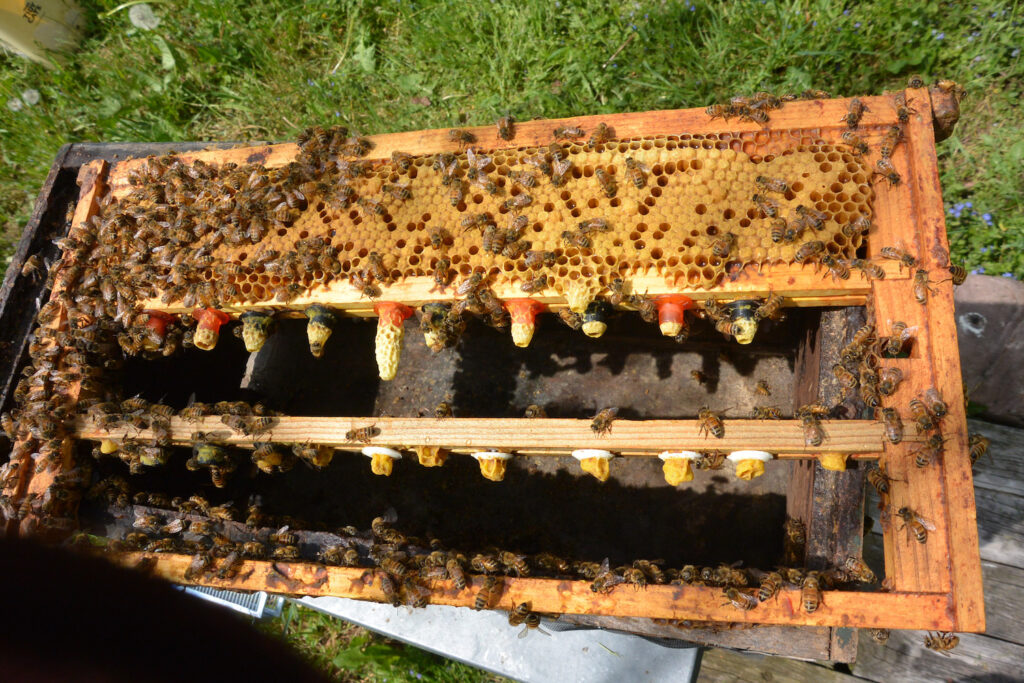
The total queen cups charged in this experiment: 11 with larvae and another 6 with eggs. I caged the queen with this frame on May 7; it took a while to produce these queen cells. (Commercial grafting techniques would have produced a full frame of queens, all of the same age and size, in about a week instead of two.)

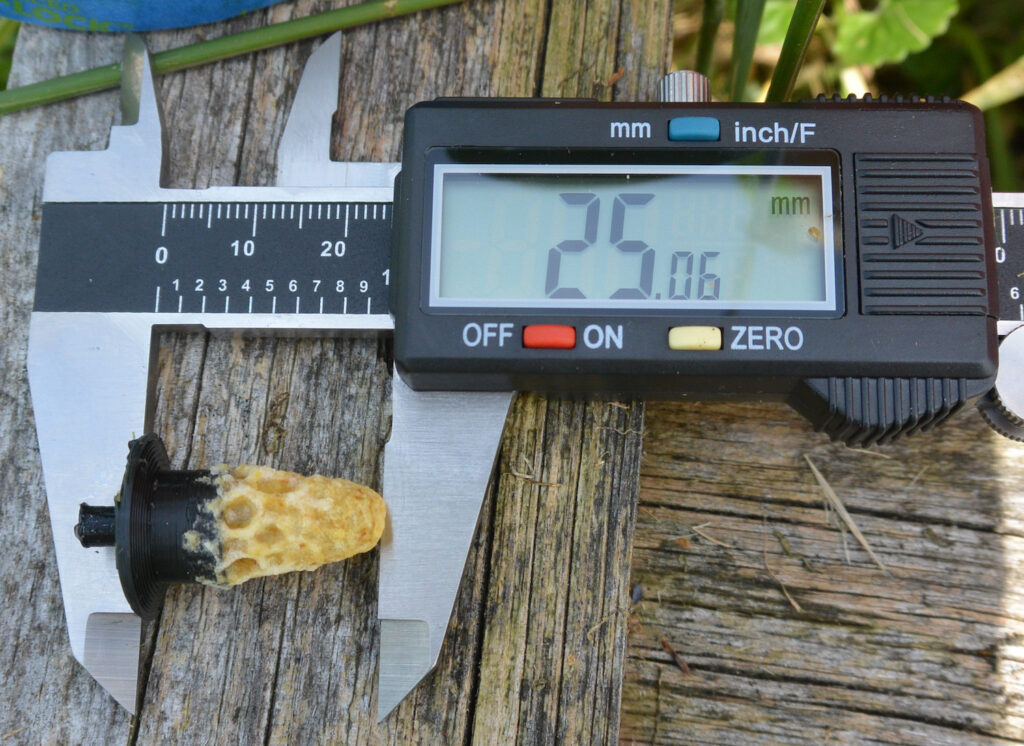
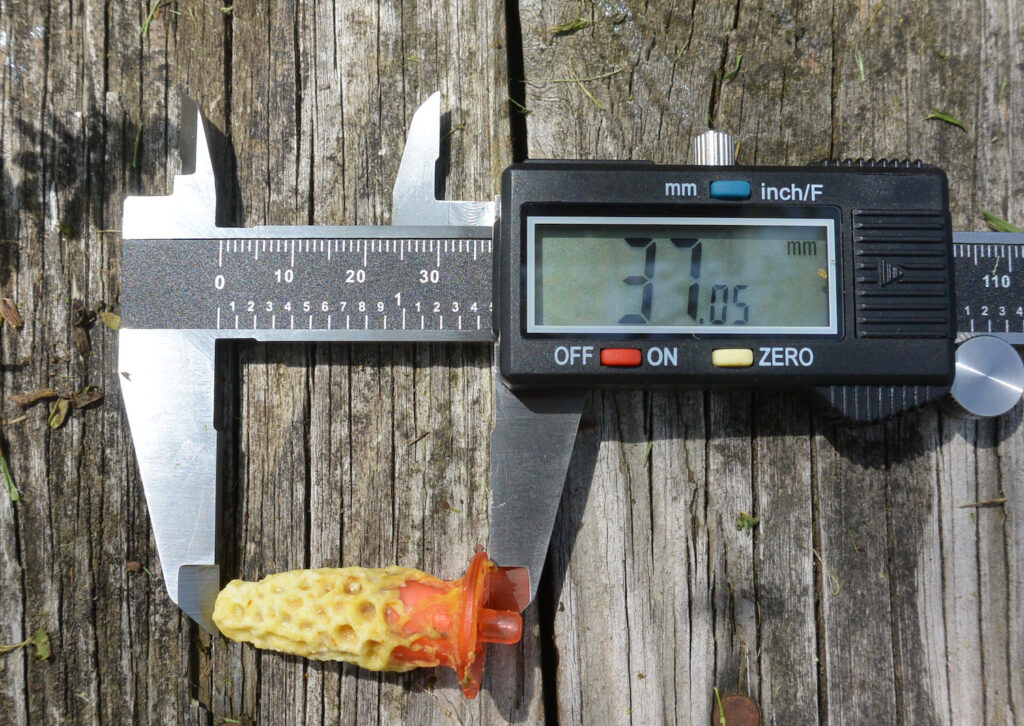
The fully capped queen cells are not what I’d call gorgeous – they seem rather small, around 25-26mm in length (something that I’ll do a more thorough literature search on to compare).

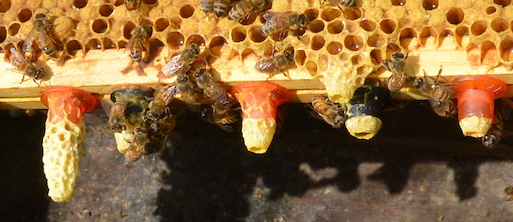
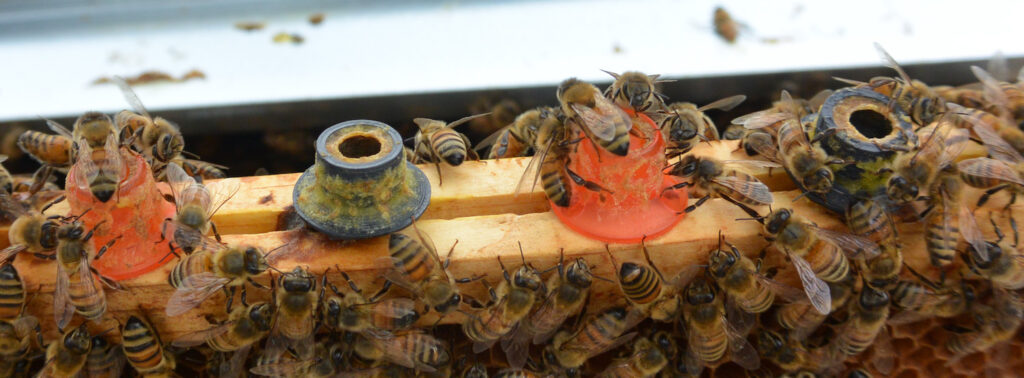
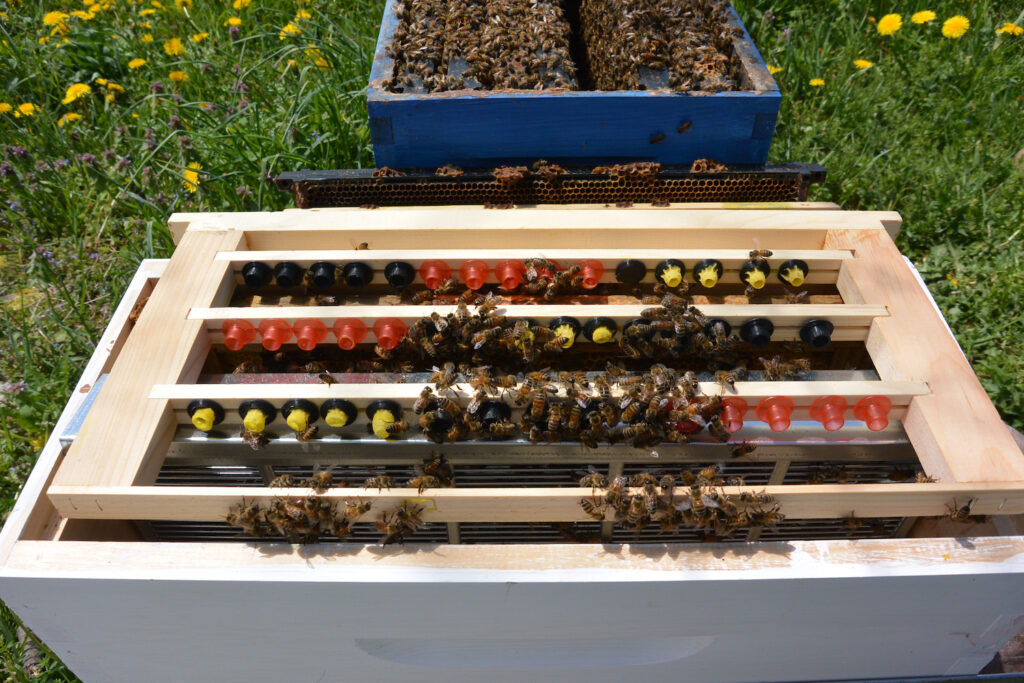
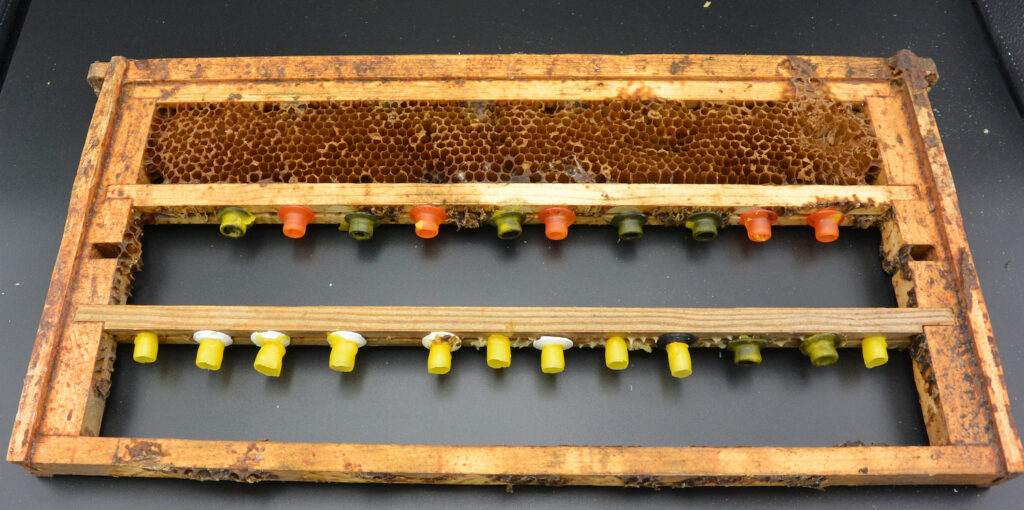
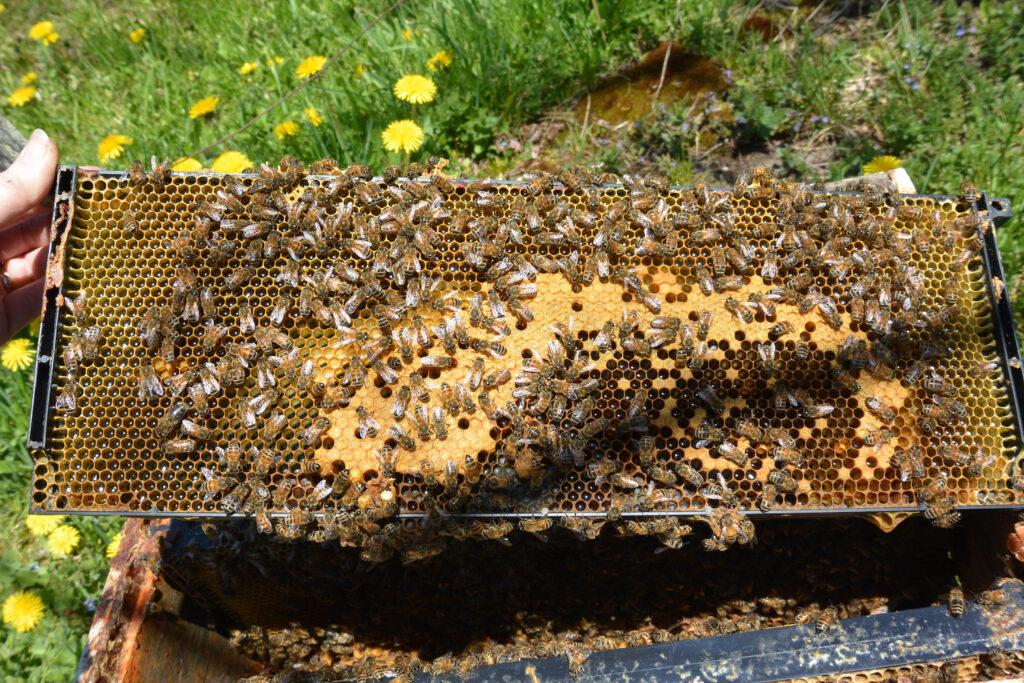
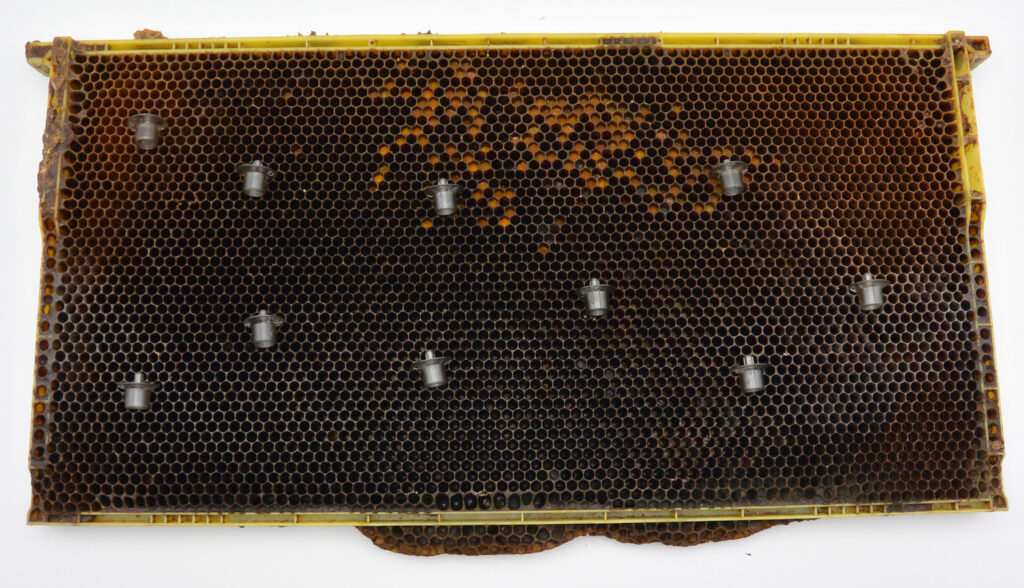
This frame was added to its hive on May 8. It produced 10 queen cells out of 20 cups offered. The cells directly under the brood are all nicely filled out, with apparent disregard for the type of queen cup I offered. Only one is charged in the bottom row.

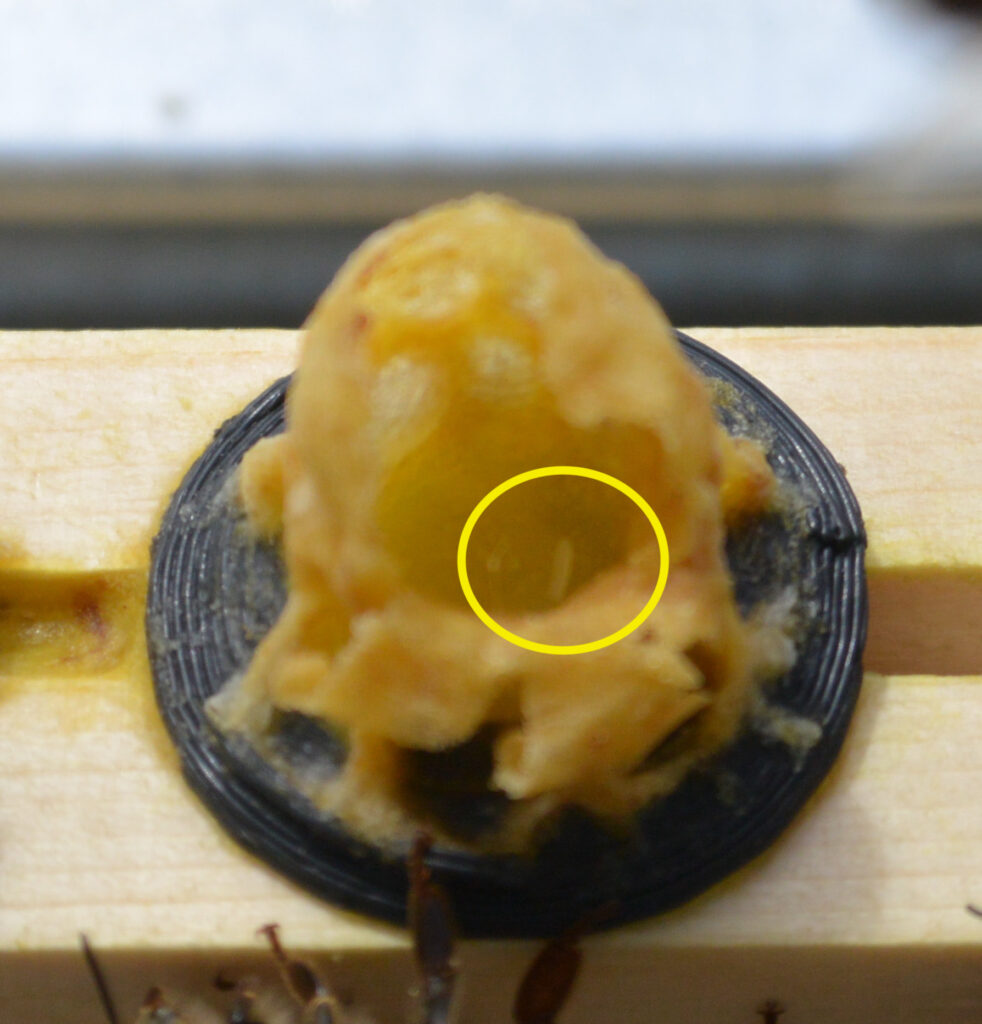
This frame has only one capped cell at this stage, but it’s a beauty:

I put these frames into a different, queenless, box with a lot of nurse bees (a cell finisher) to cap of the rest of the cells. The five capped ones are in cages, and tucked into a hive to incubate them. I want to make sure they hatch before finding them new homes.

I’ll be taking these observations and lessons and refining my approaches for the next round of trials. I am pushing two more hives to the swarm point, as well as a small nucleus box, to see what they’ll do for me.


Northeast SARE LogoThis material is based upon work supported by the National Institute of Food and Agriculture, U.S. Department of Agriculture, through the Northeast Sustainable Agriculture Research and Education program under subaward number FNE24-102. Any opinions, findings, conclusions, or recommendations expressed in this publication are those of the author(s) and do not necessarily reflect the view of the U.S. Department of Agriculture.

Wax Coatings and Queens in the Making

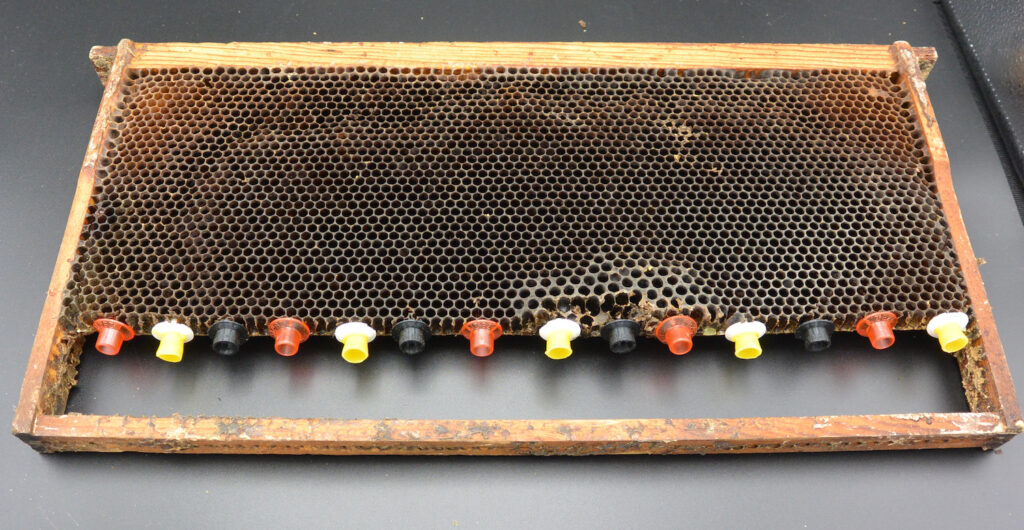
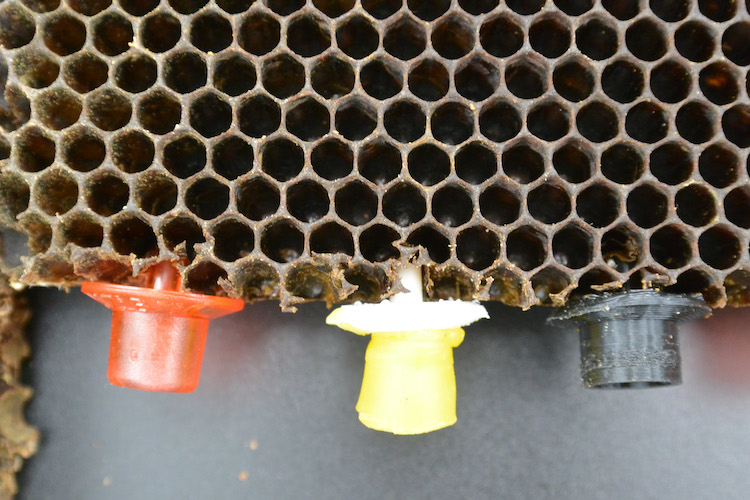
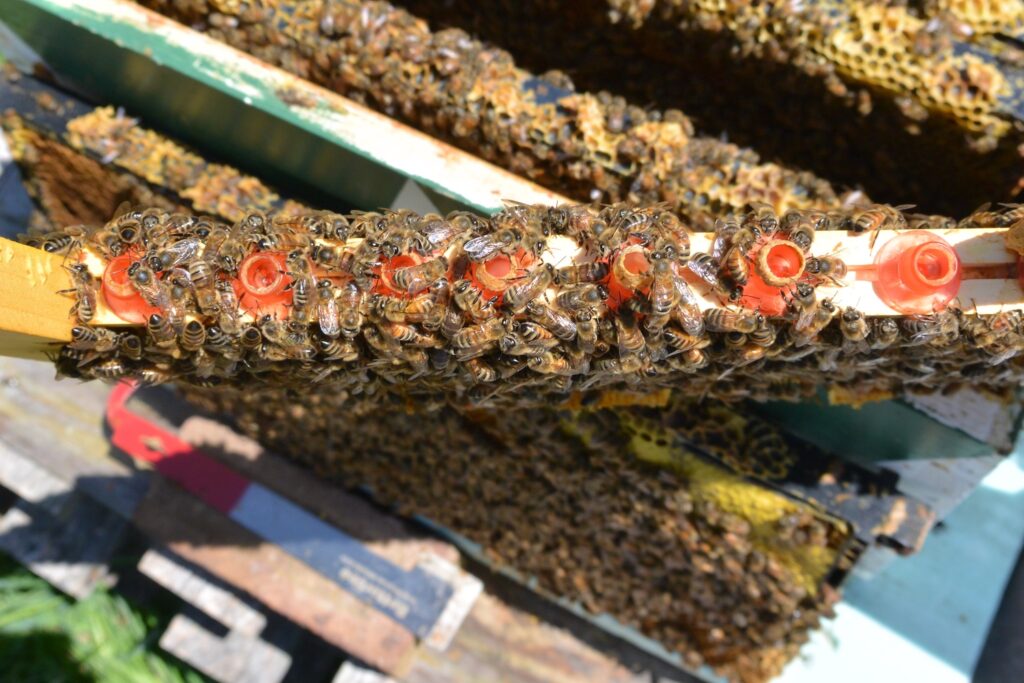
It was 50F (10C) again, cloudy, the bees certainly telling me that this was NOT the time to be beekeeping, but at least it didn’t rain. I was able to get a better picture of the wax-dipped cups, now all knobbly and adjusted by the workers. Of interest: one of the first things they did was to narrow the opening. I’ve seen this consistently, even with the wax-only cups.

In Hive 1, I saw some promising signs: an egg!

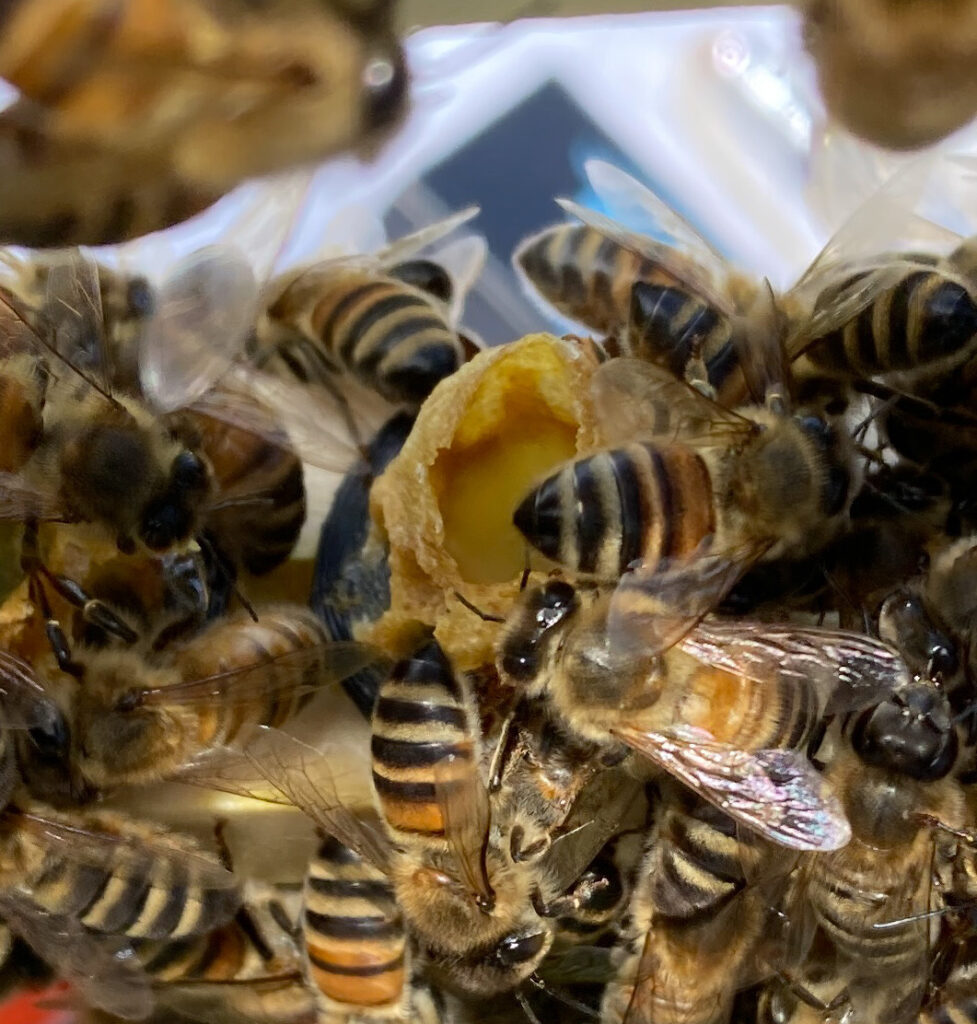
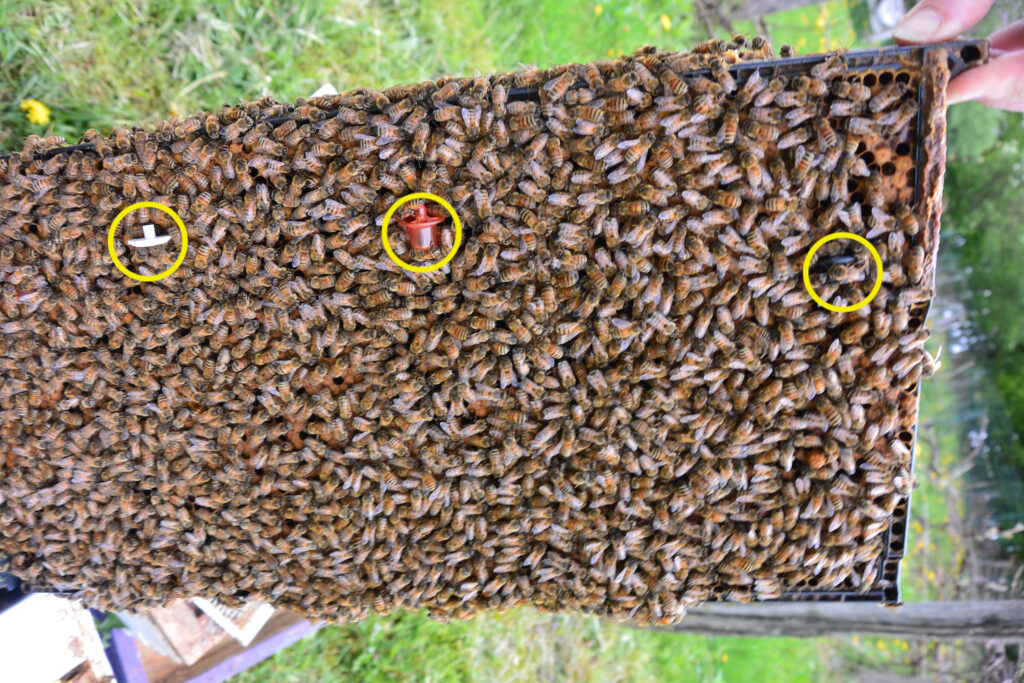
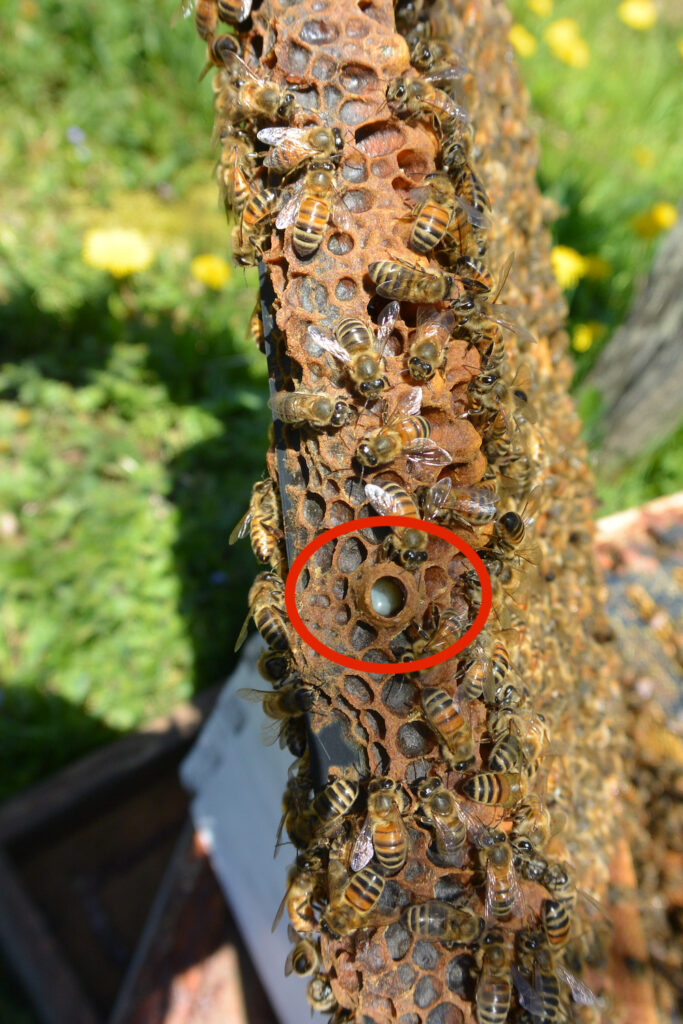
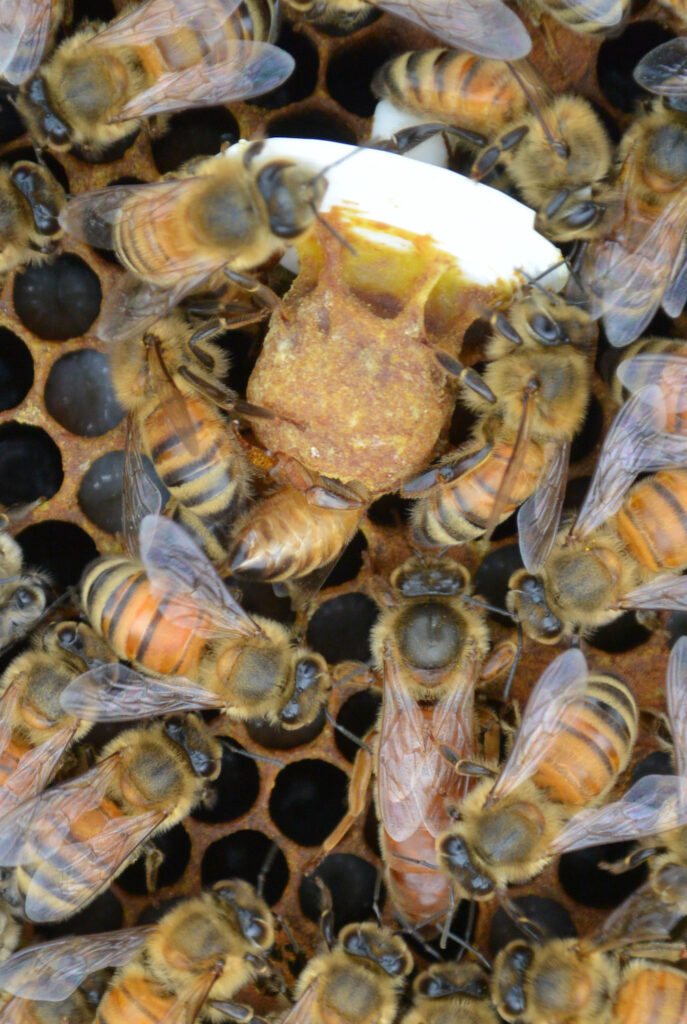
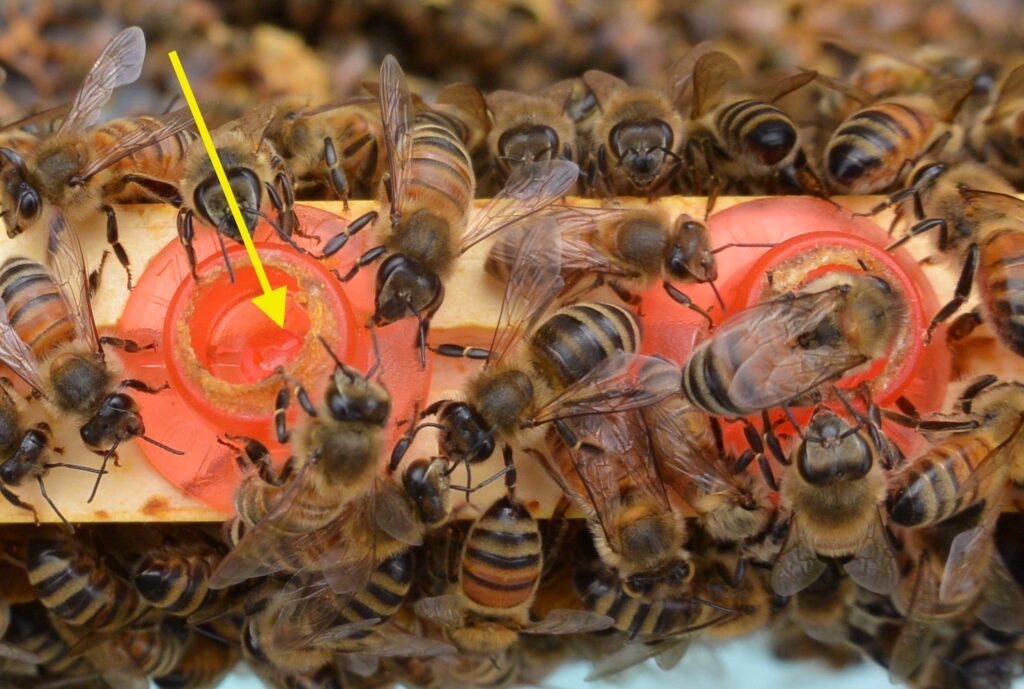
And even more promising: a charged queen cup. I opened up the entrance slightly to check, and for photos. (The bees should fix it, no problem.) That white in the bottom of the cell, right under the bee’s tush, is royal jelly (and a lot of it). They’re feeding a queen larvae.

Now that I have queens in process, I’ll leave this for a week and then swap this frame for another model. Then I’ll know how many queen cells I have started on this queen bar.


Northeast SARE LogoThis material is based upon work supported by the National Institute of Food and Agriculture, U.S. Department of Agriculture, through the Northeast Sustainable Agriculture Research and Education program under subaward number FNE24-102. Any opinions, findings, conclusions, or recommendations expressed in this publication are those of the author(s) and do not necessarily reflect the view of the U.S. Department of Agriculture.

Wax Makes the Difference

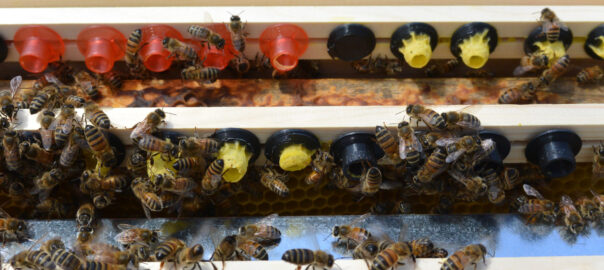
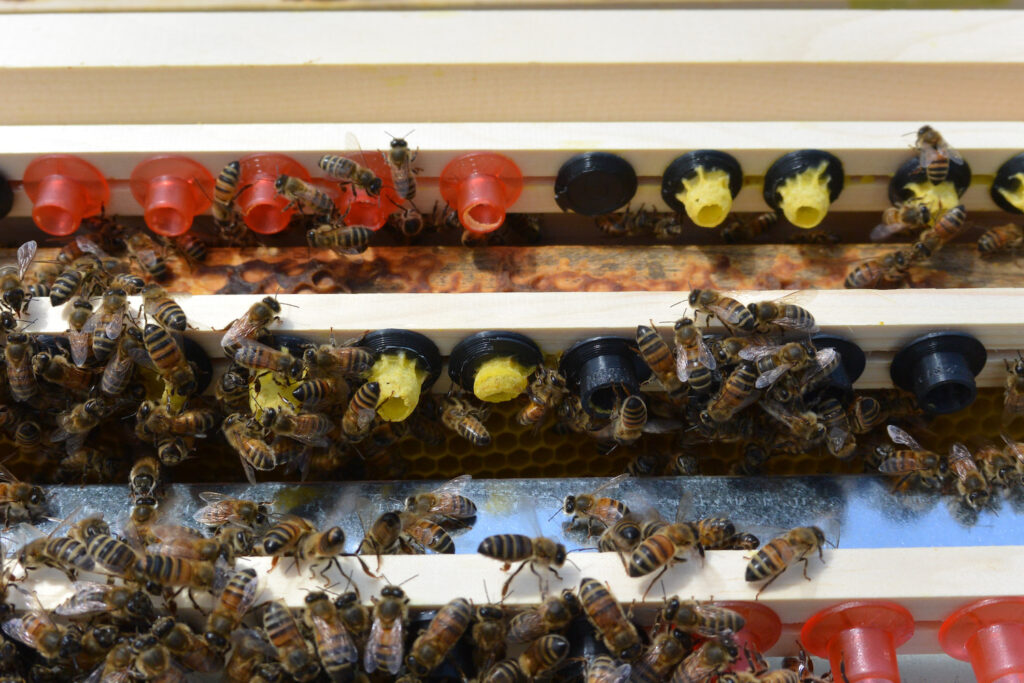
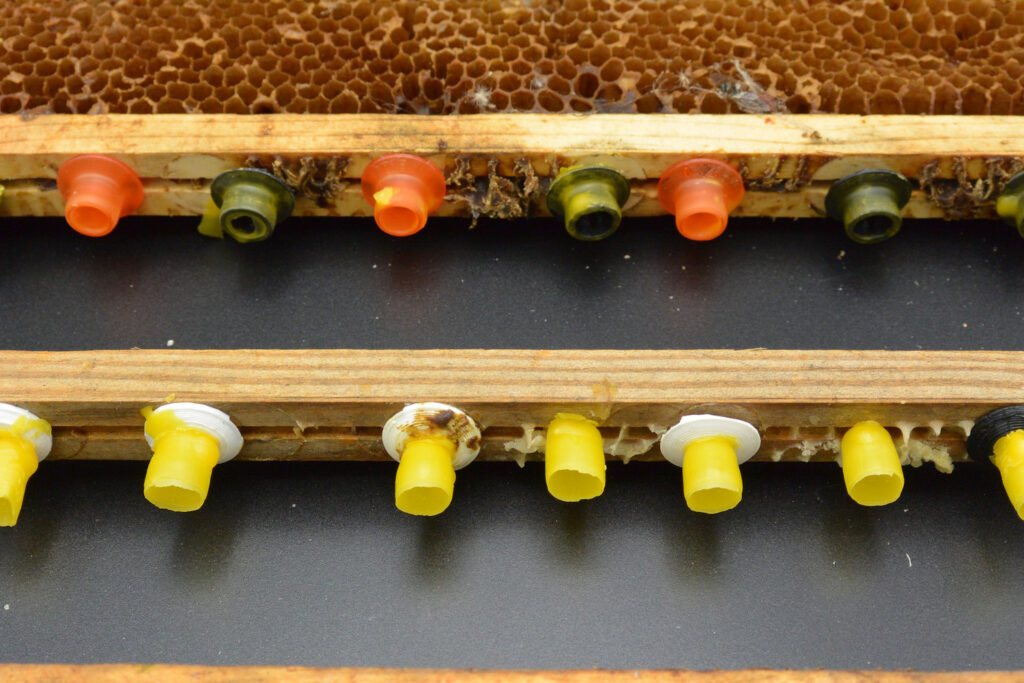
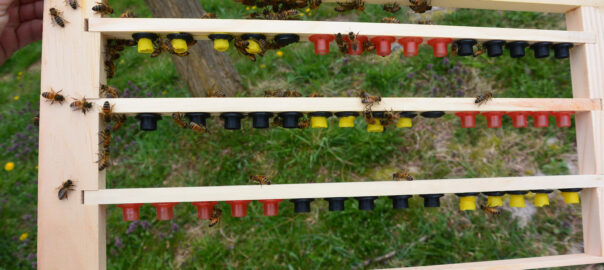
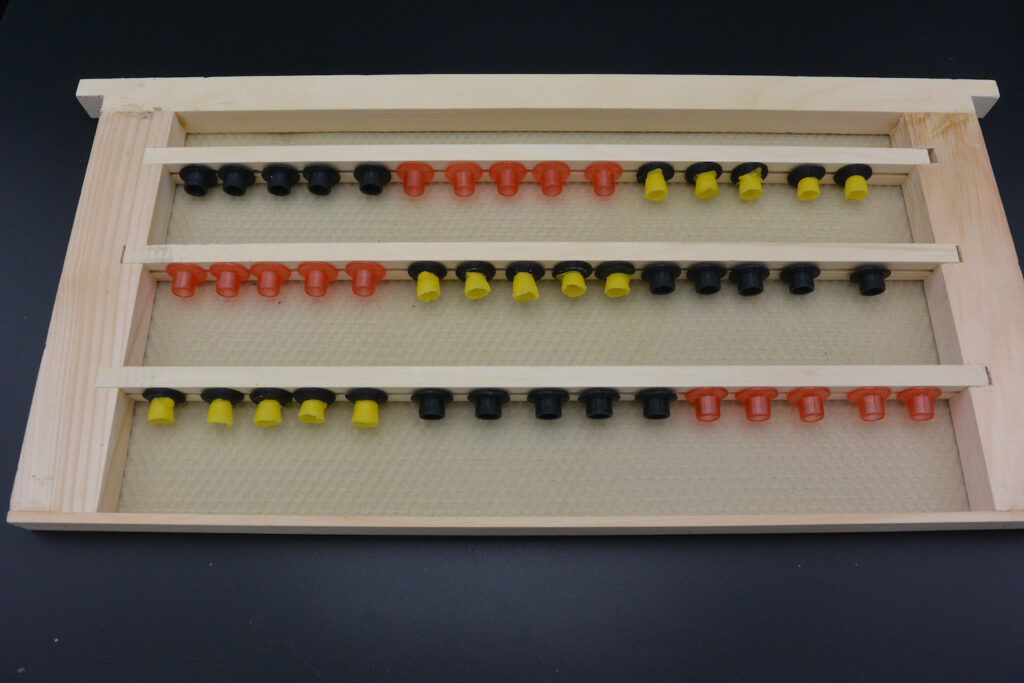
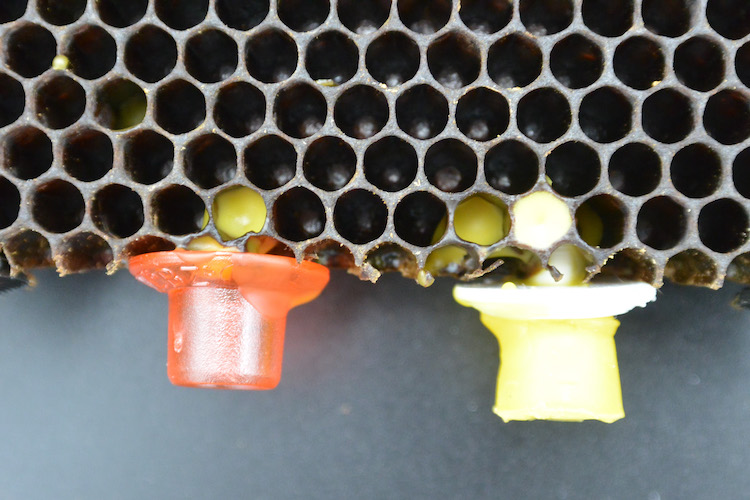
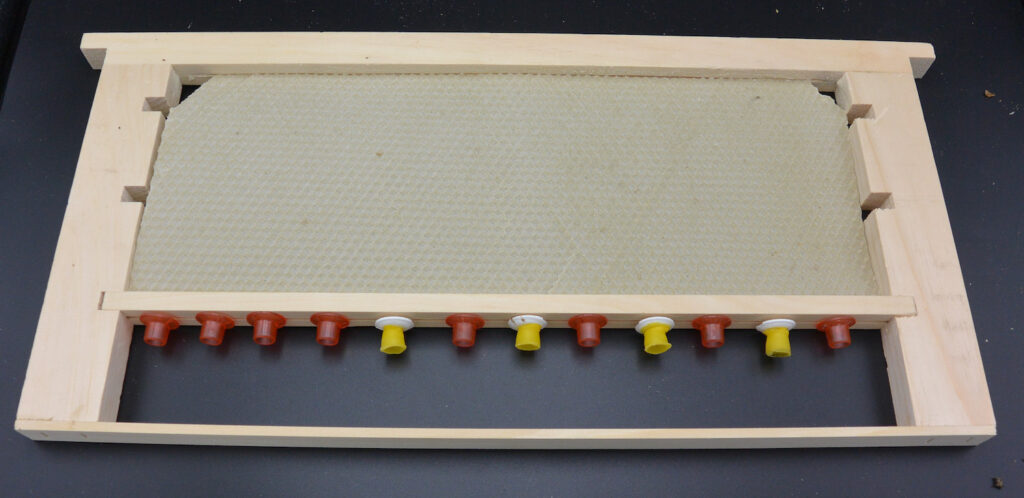
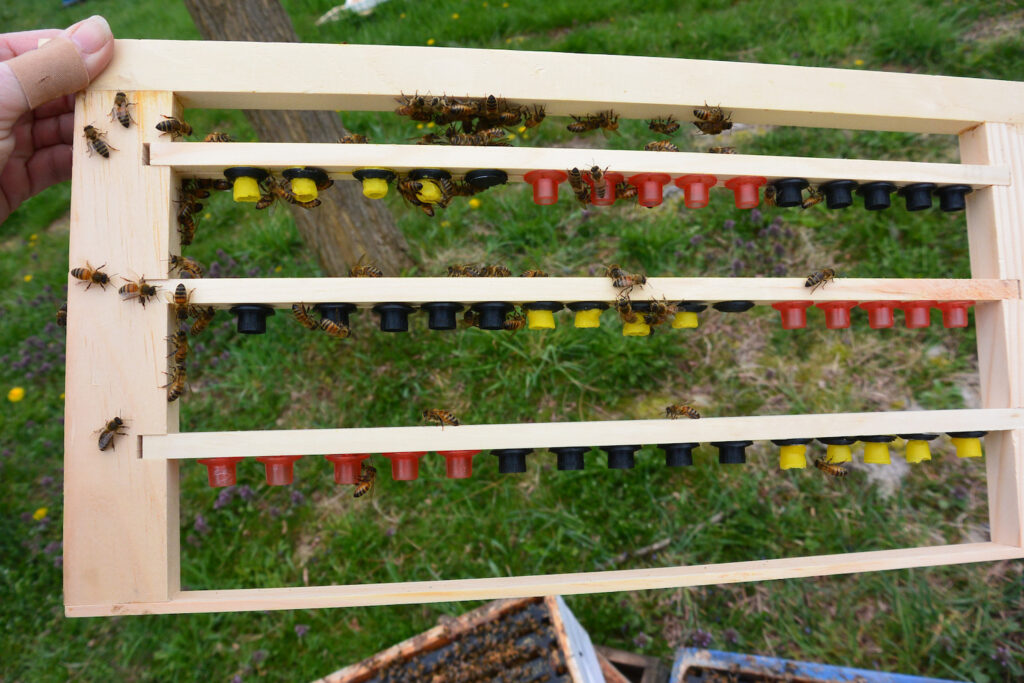
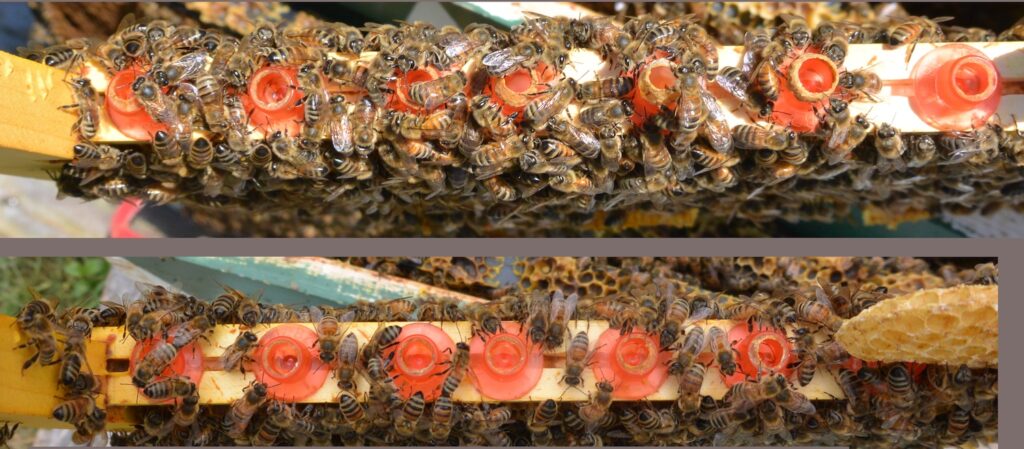
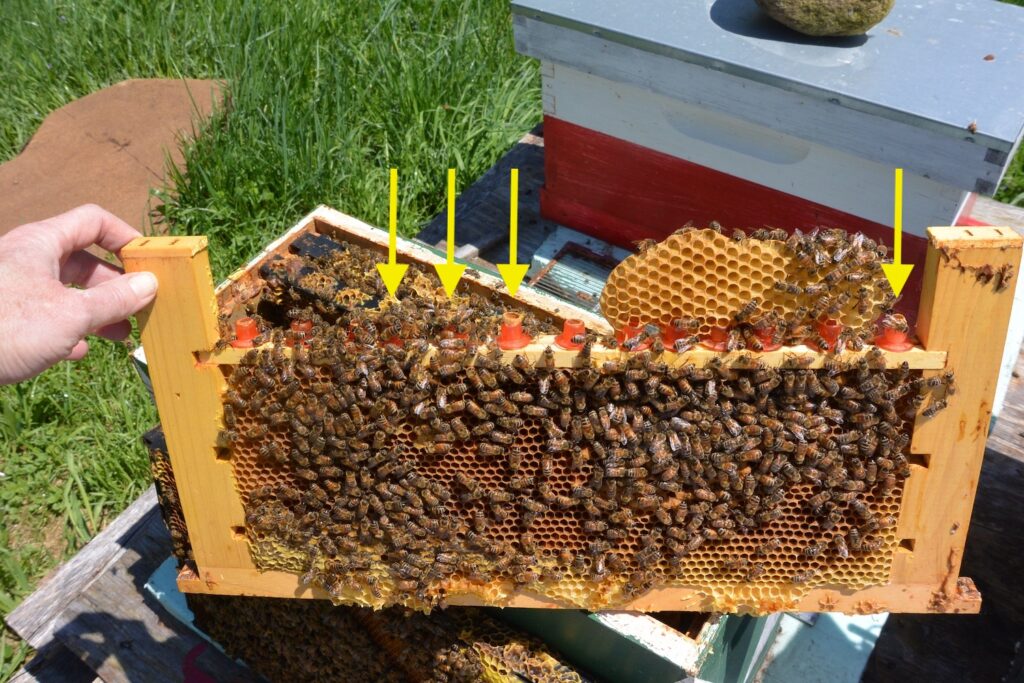
On May 8 I pulled the frame I’d inserted into my primed hive the day before. This frame is just queen cells — three bars with standard JZBZ, homemade wax cups, and 3D printed cups. As I anticipated, the bees enthusiastically drew out the waxed cups. (Compare this with my April test run.) Unexpectedly, they didn’t touch either of the plastic versions.

You can see a little bit of wax action on the edit of the last red cup at the top — they’re taking interest, but not nearly as enthusiastically as the wax cups I gave them. There were no eggs in the cups yet.

Also on May 8 I re-introduced a queen cage in a second hive. Hive 2 was not quite as swarm-ready as the first, judging by the queen cups — there were many drawn, but the workers weren’t quite as interested in them as they were in the first hive — and none were charged. This hive received a frame with about 2″ of drawn comb at the top, and then two bars of queen cups.

However with this frame, I dipped all of the plastic cups (JZBZ and 3-D printed) in hot wax to give them a coating. This frame was prepped before I saw the results from Hive 1, done on a hunch.

Unfortunately the weather’s not been great for opening hives. The last two days have been too chilly. I thought I had a window today (May 11) when the sun popped out (it’s still only 50F / 10C) and pulled out the cage from Hive 2.

There’s a ton of bees in there, and from what I could see, they’ve started to draw out all of the cells I gave them – plastic or wax. The rain moved in before I could clean off the frame and get a better picture, and before I could check the frame in Hive 1 to see if there were any eggs laid up yet.

My assumption is that the queen laid in the foundation at the top of the frame, which drew in a bunch of nurse workers to take care of them. They then directed attention to the queen cups.

Hive 2 had originally received the side-facing cups in my April test runs. When I released the queen the first time, I just popped the frame back in to see what would happen. Interestingly, they have ignored those queen cups.

Tomorrow afternoon I’ll try again so that I can properly clear out the queen excluder and get a good look into Hive 2’s frame, as well as see what’s going on in Hive 1.


Northeast SARE LogoThis material is based upon work supported by the National Institute of Food and Agriculture, U.S. Department of Agriculture, through the Northeast Sustainable Agriculture Research and Education program under subaward number FNE24-102. Any opinions, findings, conclusions, or recommendations expressed in this publication are those of the author(s) and do not necessarily reflect the view of the U.S. Department of Agriculture.

Primed to Swarm

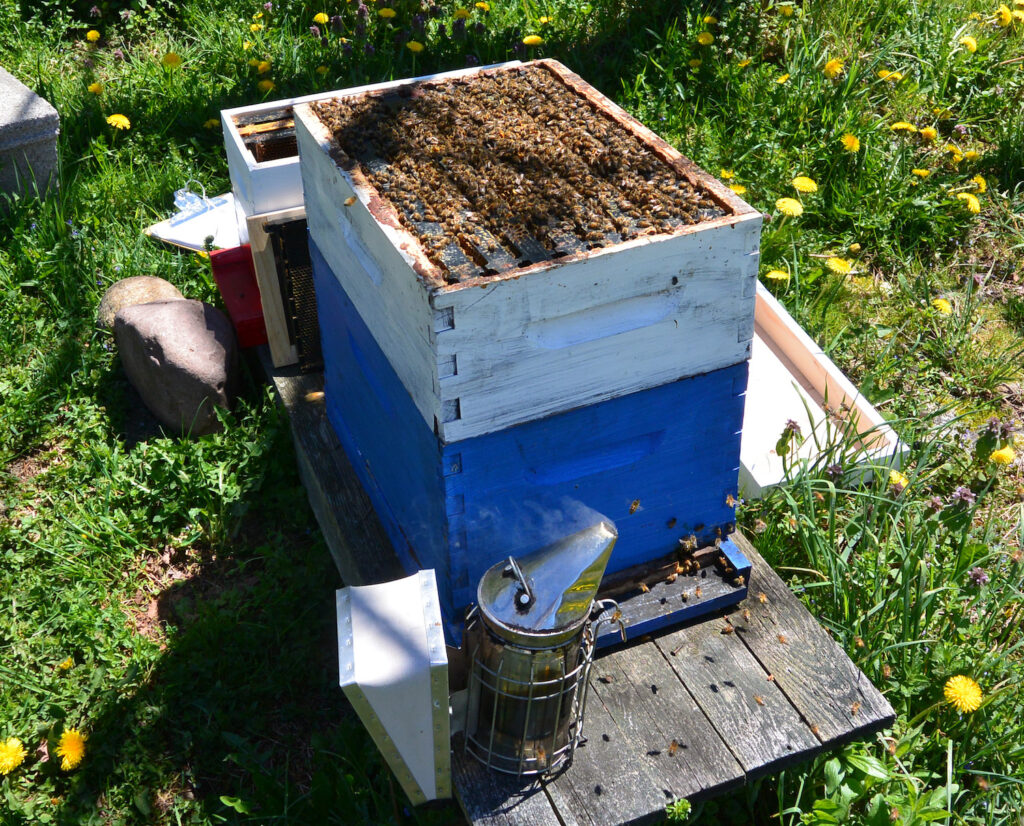
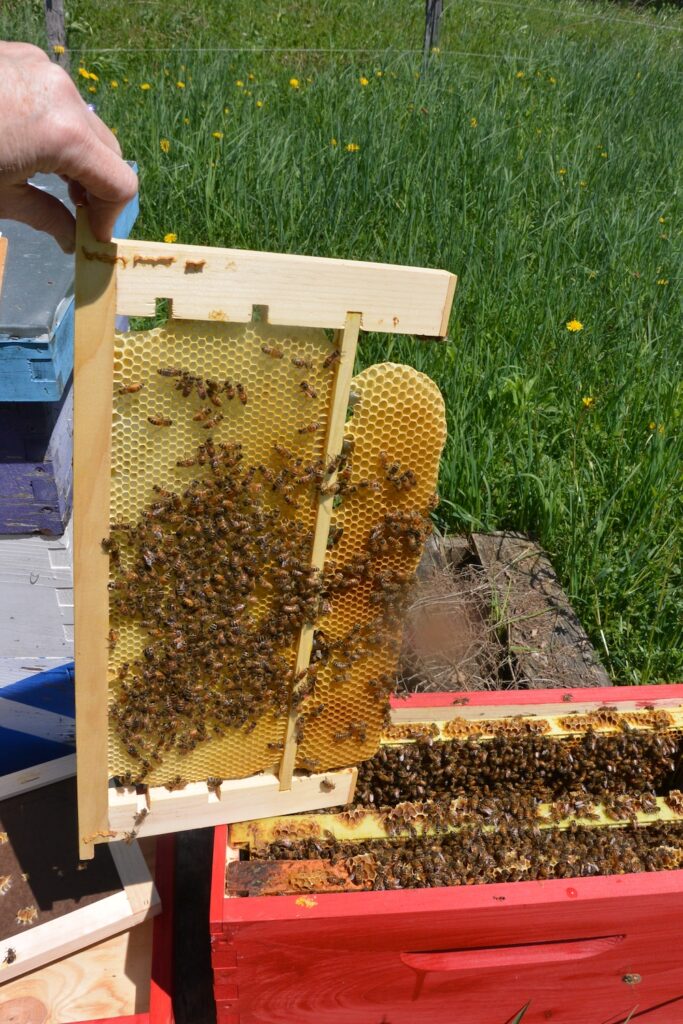
This hive told me today that they’re ready to swarm. The population is high, the brood nest is full, and the weather is ideal.

The bees look like that all the way to the bottom. When the foragers out gathering pollen and nectar return for the night, it’ll be chock-a-block full.

The outer bees on this frame are curing nectar (you might see the glint of it in the cells), the tan cells are larvae turning into bees, and under that are larvae that haven’t been capped yet.

There were many queen cups scattered through the hive, but classically this queen cup at the bottom of the frame is “charged” — there’s a new queen on the way. This location says it’s a swarm queen.

This was one of my first trial hives that yielded no eggs in queen cups. I found the queen, and returned her to the queen cage with the same frame configuration — a queen bar with just queen cups available. I also pulled the top box and made a split, taking that beautiful swarm cell with it for a new hive for the apiary.


Northeast SARE LogoThis material is based upon work supported by the National Institute of Food and Agriculture, U.S. Department of Agriculture, through the Northeast Sustainable Agriculture Research and Education program under subaward number FNE24-102. Any opinions, findings, conclusions, or recommendations expressed in this publication are those of the author(s) and do not necessarily reflect the view of the U.S. Department of Agriculture.

April Test Runs

I’m not the only one excited about the idea of having queens directly lay queen-destined eggs. See this excellent post from a beekeeper in the UK, who has also found Rebecca Noll inĀ  New York, and Adrian Tonks from New Zealand, who are running similar trials with different approaches.

I suspect that our collective observations will lead to some interesting lessons about how workers and queens go about their queen-rearing processes!


On 23 April I started an initial round of testing. I had two immediate goals: find out the quirks of using a queen isolation cage, and test the question of “will the queen lay in queen cups if that’s all she has?” I used the queen bar, side-face, and 75% frames for the first runs.

The three selected hives had a deep / medium box configuration. They had varying amounts of brood, and at least 70-75% population of workers filling the colony. All colonies had mature drones as well as drone brood. None of the colonies approached swarm conditions; the worker and drone populations were too low, and they had adequate space for the queen to lay.

Due to the weather, I ended up monitoring them every 48 hours, instead of my target 24 hours. After 96 hours I released all of the queens back into the hive to allow them to build up the colony more for my May trials.

Queen Bar

After 48 hours, there were no eggs in the queen cups, nor had the few workers in the cage with her started to draw out any of the cells.

After 96 hours there were still no eggs in the cups. The workers had started to reshape the wax cups I’d used into “proper” queen cup shape, but had not started to draw out any other comb on the frame.
A queen can lay up an entire frame in 48 hours (see below) so she either did not lay in the cups, or laid in the cups and the workers removed the eggs.

Side Facing

For this trial I removed a frame that was largely filled with eggs and young larvae, and pressed my cups into the side of the frame. As I mentioned in the previous post, I had trouble with the cups and the width of the queen isolation cage. I had much better luck (obviously) attracting the workers into the cage with the queen, but still no eggs in cups even after 96 hours.
Something interesting about this colony: they had started to reshape the wax cup into a queen cell, taking my carefully-crafted 9.5mm wax cups and narrowing the entrance diameter. (This cup was not charged.)
75% Frame

I used the empty frame I’d set up for this trial. This gave the queen lots of room to lay, then left her with just queen cups. Similar to the other trials, by the time I released the queen at 96 hours, there were no eggs in the cups. By 48 hours she had laid eggs in 90% of the frame so there’s nothing wrong with her laying rate!

Thoughts on the Trials

I did not have expectations that I would find eggs in the queen cups. This matches an experience I had in 2023 with a quick and dirty trial using a queen cell bar. The bees just started making worker comb on it. Whether the queen or workers are responsible for this result I can’t say without directly watching the queen’s and workers’ behavior.

Finding the queen to isolate her was the most time-consuming part of the process. Having an empty nuc box to one side helped a great deal. I could ready my queen cage in the nuc box while I hunted through the hive — or use it to set aside frames I’d already searched.

The isolation cage take a bit of getting used to. They’re designed to fit snugly against the rabbets of the brood box, so if there’s accumulated wax or propolis you need to scrape that away for everything to fit properly.


Northeast SARE LogoThis material is based upon work supported by the National Institute of Food and Agriculture, U.S. Department of Agriculture, through the Northeast Sustainable Agriculture Research and Education program under subaward number FNE24-102. Any opinions, findings, conclusions, or recommendations expressed in this publication are those of the author(s) and do not necessarily reflect the view of the U.S. Department of Agriculture.
Frames at the Ready

It’s been an educational time setting up frames for the summer trials, and running initial tests to learn what I don’t know about the equipment (and the bees). Breaking it down by frame type:

Straight Queen Bars

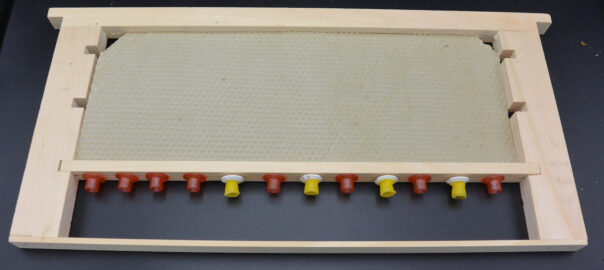
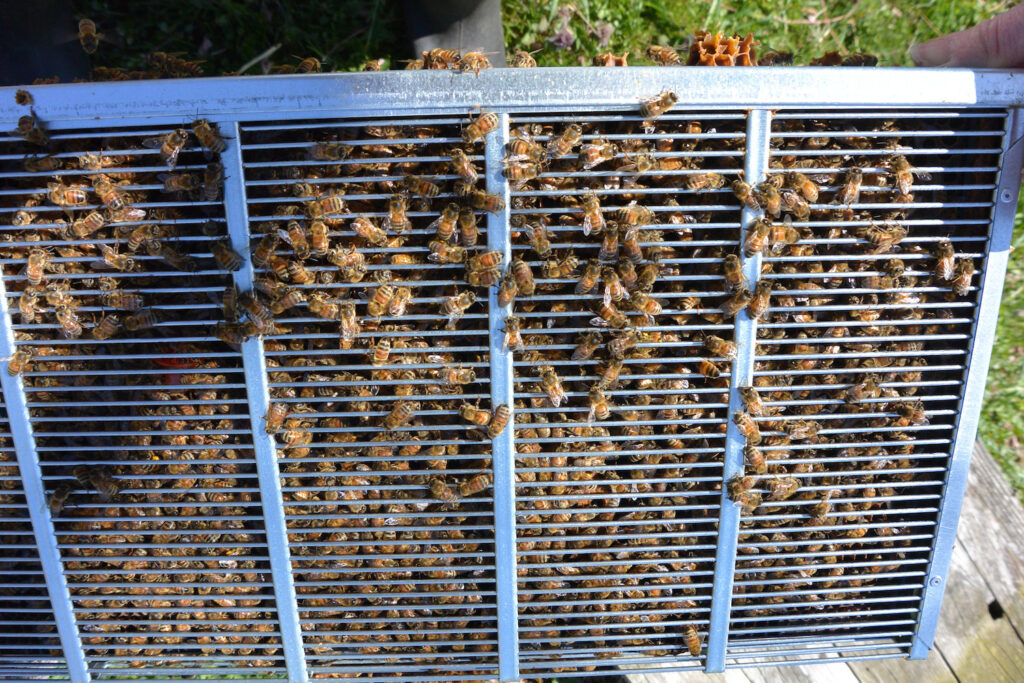
My dream configuration: you just put a queen bar frame into a cage with the queen and let ‘er rip. This would give the queen breeder the ability to generate a large number of queens at a time. (The wax foundation is behind the frame only to make it easier to see in the photography.)

A standard queen cell bar with empty cups in place.

Two challenges from this design. One is that when I drafted my queen cup files, I used a queen bar that I’d used in the past and not a brand-new bar. Turns out that the gaps where you push the stems of the cups are different sizes and the larger, printed cups don’t fit well. This is particularly problematic with the bases for the wax cups; the bases flex and the wax cups can pop off.

The 75% Solution

Working from observations that beekeepers generally find swarm cells toward the bottom of the frame, I took a frame of drawn comb, and with a little help from a ruler and dremel tool took off the lower 25% of the comb. I then pushed my cups into the wax at the bottom.

As you might guess, the cell cups don’t want to stay in the frame — the stems aren’t long enough to penetrate through enough wax cells.

A couple of drops of beeswax glued them in.

I went this route mainly because of the drawn comb. The better approach uses a queen frame, with a bar at the lower quarter. This will make it much easier to generate queen cells repeatedly. I have two of these in hives for the bees to draw out the upper 75% of the comb for further testing this summer.

A 50/50 Approach

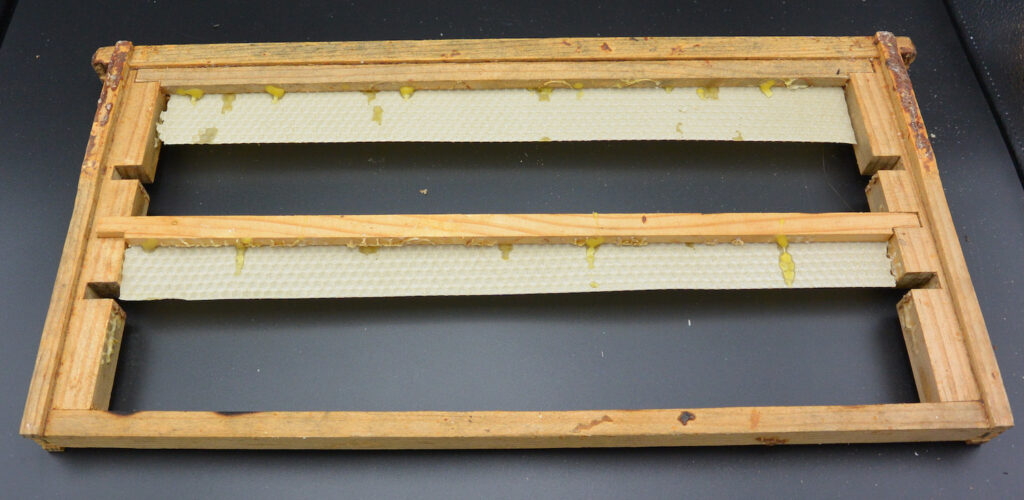
Unfortunately, my new queen frames don’t have the perfect configuration for bars for a 50/50 approach similar to the 75% version. A different style of queen frame I had on hand was a little more amenable to my purposes. We’ll see how the bees draw this comb out and then I’ll decide if/how to use it in the hive. I would like a row of cells at the bottom of both starter strips.

Coming From the Side

This image is from my grant proposal, since I apparently neglected to photograph the one I used in my initial trial last month. Again working with what we see in the hives, offering cups that are randomly arrayed on the side of the frame.

The cups are stable in the wax, but the queen cages aren’t wide enough to accommodate the frame and the cups. When I inserted into and remove it from the cage, some of the cups popped off. Rather than center it in the queen cage, I might be able to align it to one side and have better success.

The Queen Cage

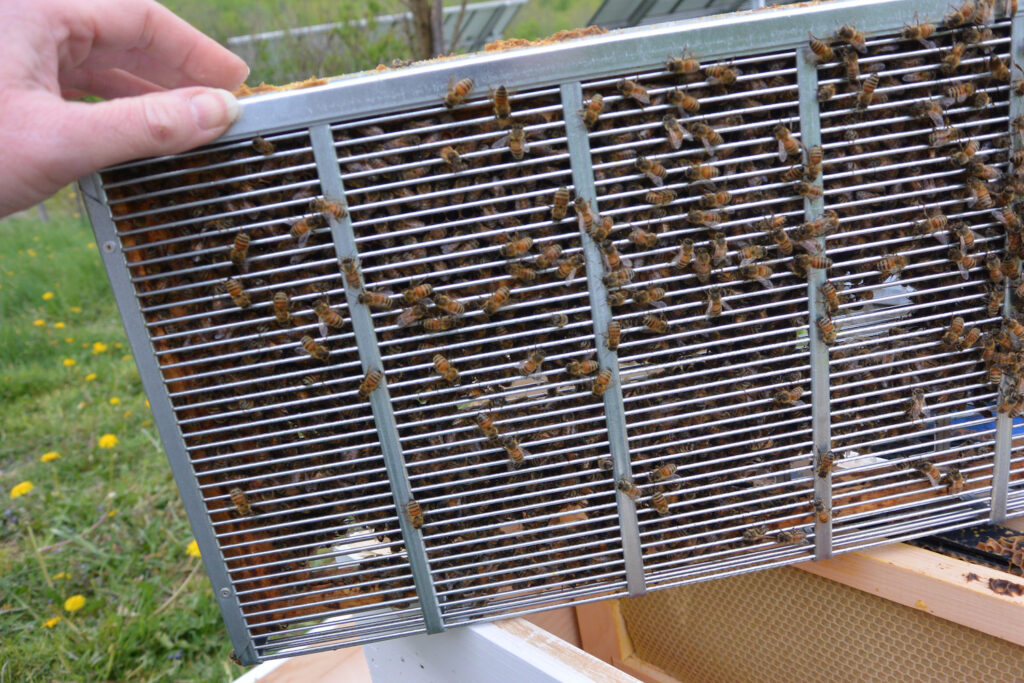
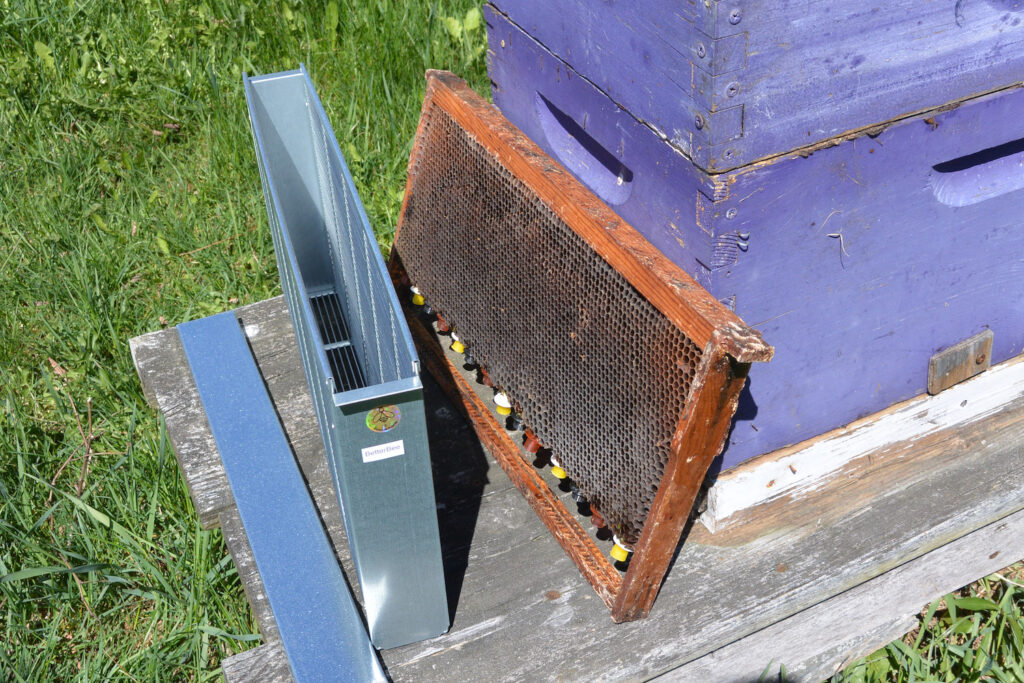
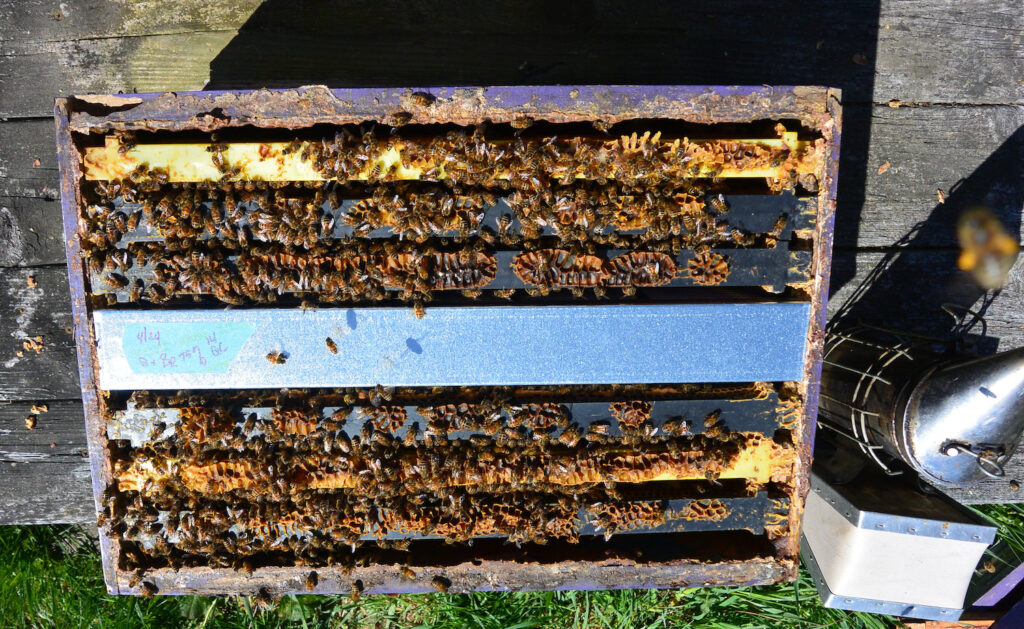
The “Queen Cage” I repeatedly reference is a deep frame isolation cage purchased from Betterbee. The frame fits in the cage, you put the top on and insert it into the hive.

In order for it to fit in the hive, you do need to remove a frame to make everything fit.


Northeast SARE LogoThis material is based upon work supported by the National Institute of Food and Agriculture, U.S. Department of Agriculture, through the Northeast Sustainable Agriculture Research and Education program under subaward number FNE24-102. Any opinions, findings, conclusions, or recommendations expressed in this publication are those of the author(s) and do not necessarily reflect the view of the U.S. Department of Agriculture.

9mm Queen Cups

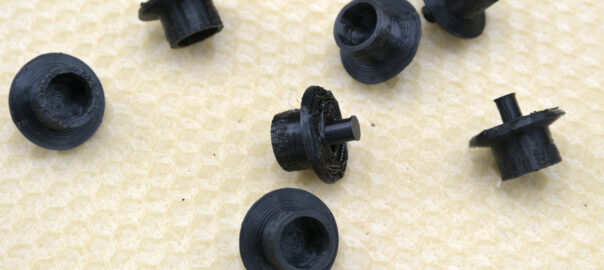
Based on an STL file I found on Printables I did some editing in TinkerCAD to adapt the file to my own purposes for this study. The stems are just a touch thicker and I added a notch under the skirt (because I could) to make it easier to get the corner of my hive tool under it to pry out a fully capped queen cell.

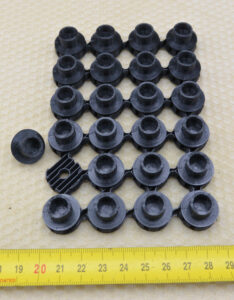
Using a Snapmaker 350 printer, I batch-printed 24 cups with black PLA filament so I can easily see if it contains an egg or not. The printing requires supports, but the cups pop out pretty easily. On the Snapmaker, with the settings I used, it takes about 8 hours to print a batch of 24.

I used the same original STL file to design the base only for the wax cups. Although it’s very tempting to keep churning out my own queen cups, I’m limiting the first run to 48. Once I know what the bees do (or don’t do) with them, then I can make further decisions about them.

I will make more bases for my wax queen cups from the black filament since I ran out of the white. I don’t anticipate the base colors to affect the queen’s use of the cups.


Northeast SARE LogoThis material is based upon work supported by the National Institute of Food and Agriculture, U.S. Department of Agriculture, through the Northeast Sustainable Agriculture Research and Education program under subaward number FNE24-102. Any opinions, findings, conclusions, or recommendations expressed in this publication are those of the author(s) and do not necessarily reflect the view of the U.S. Department of Agriculture.
""

Wax Queen Cups

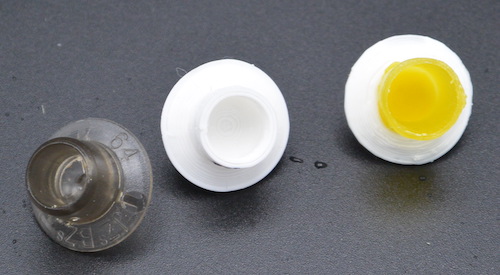
One of the elements I’m testing in the swarm queen grant are three different queen cups; standard JZBZ cups (8.5mm inner diameter), 3-D printed cups (9mm ID), and hand-dipped wax cups (9.5mm ID). The reason behind these three versions is that there’s evidence that larger queen cups allow for larger queens to a certain extent. (According to information in the 1983 publication Queen Rearing: Biological Basis and Technical Instruction by Friedrich Ruttner, 8-10mm ID is the range acceptable to honey bees.)

While I’m waiting for the grant’s i-s to dot and t-s to cross, I tested making wax cups at home. I can get them commercially, but by making my own I have more control over the final product.

""
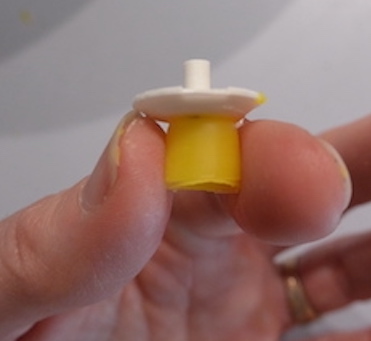
From left to right: JZBZ, 3D printed, and wax cups.

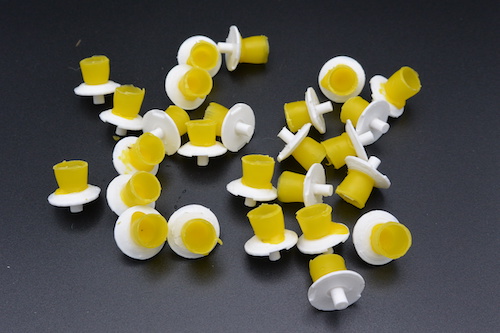
While I don’t love rendering beexwax (taking it from an ugly mess to a heavenly, clean, golden block), I do love working with it! I used instructions in The Hive and the Honey Bee with the addition of printed bases to make them easier to handle the cells, and to insert them into my experimental frames. I turned out 20 of these lovely cups in about 15 minutes or less.*

""

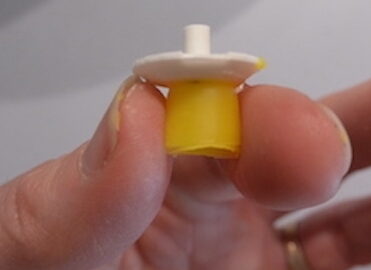
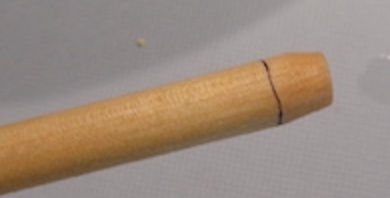
It turned out to be a super-simple process. I took a 9.5mm dowel and shaved one end in a standard, wall-mount pencil sharpener (three full turns of the handle), then marked a line 9mm from the base (about the same depth as a JZBZ model. This gets soaked in plain water for about 15 minutes. (Hive & the Honey Bee notes soapy water, but I found this unnecessary — plus it keeps doesn’t leave any soap residue that might influence the bees.)

""

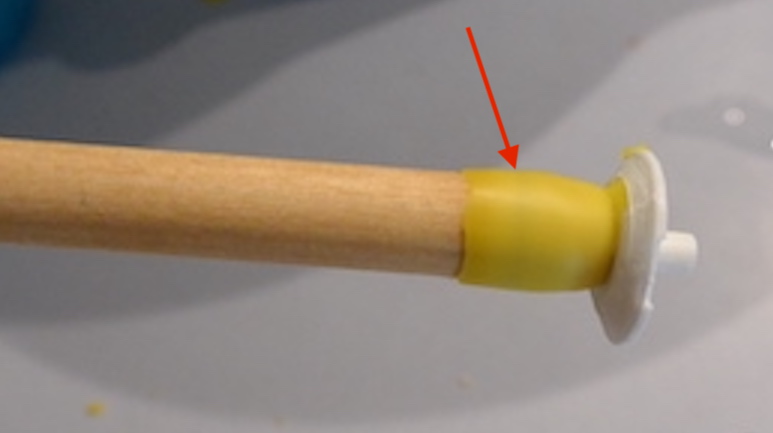
I dipped this in melted wax four times to provide a decent cup thickness. After the fourth dip, i quickly pressed it to the base. This got dipped into ice-cold water for about 5-10 seconds.

""

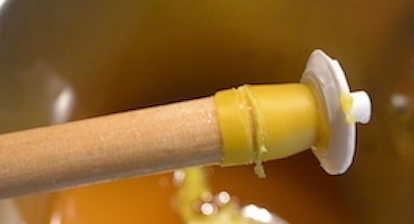
You can just see the 9mm mark I made on the dowel – I scored along that line and removed the excess for a clean(ish) cut.

""

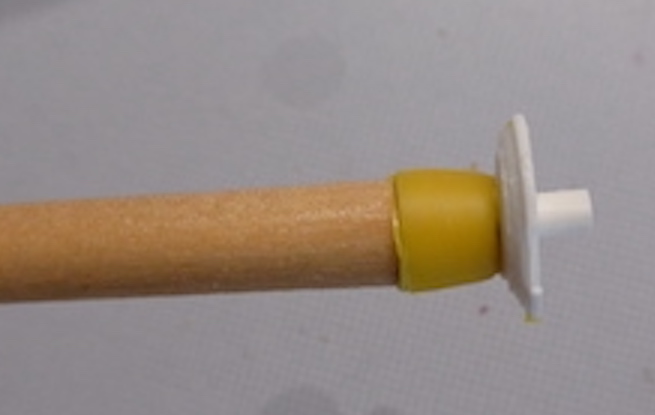
Then I carefully removed the cup from the dowel. Voila! A beeswax queen cup that easily pops into a standard queen cell bar, and which I can pry or relocate easily.

""

For someone who wants just a few queen cups for personal use this is an easy and economical way to do so. (You don’t need the bases that I use — just tack the cups directly onto a queen bar.)

*Prep time not included (melting wax, printing bases, soaking dowels).


Northeast SARE LogoThis material is based upon work supported by the National Institute of Food and Agriculture, U.S. Department of Agriculture, through the Northeast Sustainable Agriculture Research and Education program under subaward number FNE24-102. Any opinions, findings, conclusions, or recommendations expressed in this publication are those of the author(s) and do not necessarily reflect the view of the U.S. Department of Agriculture.
Northeast SARE Logo

Northeast SARE Grant Recipient

Northeast SARE Logo

The Northeast Sustainable Agriculture Research & Education (SARE) program awarded HoneyApple Hill a grant for the 2024-2025 beekeeping seasons. Improving Apis mellifera Breeding Quality by Swarm Impulse Manipulation will explore the possibility of manipulating honey bee colonies such that the queen lays eggs directly into queen cups.

What inspired this line of research is the one-two impact of eggs that are laid directly into queen cups by the queen are larger than eggs laid in worker cells. These eggs produce bigger queens with more ovaioles (first impact). The maternal effect shows that larger queens make larger workers (second impact). Larger workers have the downstream effects of healthier hives.

In a nutshell, I will manipulate the following for this project:

  1. Create swarming conditions in single, 8-frame deeps and nuc boxes.
  2. Confine the queen to a single frame that has empty queen cups on it of three types: traditional JZBZ cups (inner diameter 8.5mm), 3D printed cups (ID 9mm), hand-dipped wax cups (ID 9.5mm). The frames will be entirely queen cups (ideal for commercial breeding), or queen cups mixed with worker cell comb that mimicking natural swarm situations.
  3. Identify conditions that encourage (or discourage) the queen laying in queen cups. Workers may ultimately dictate when/if a queen cell is charged. I expect to learn more about this during the course of this project.
  4. If the queen lays directly into queen cups, test how long the colony can maintain this condition to enumerate how many queen cells can be generated from one colony.
  5. Determine the monthly viability of a successful method from May through August.

Beekeepers swear by swarm queens when talking about “queen quality”. My ultimate goal is to find a commercially-viable process for swarm queen production.


This material is based upon work supported by the National Institute of Food and Agriculture, U.S. Department of Agriculture, through the Northeast Sustainable Agriculture Research and Education program under subaward number FNE24-102. Any opinions, findings, conclusions, or recommendations expressed in this publication are those of the author(s) and do not necessarily reflect the view of the U.S. Department of Agriculture.
Fall results of vegetation management

I’ve taken photos on and off since June, when I started my vegetation management strategy to address robbing issues. The drought affected my trial; I cut back the goldenrod just prior, so the swaths looked like this on October 11:Goldenrod field in the fall with no blooms. Nary a bloom in sight where I wanted a river of flowers. I will have to try next year, and hope the weather cooperates this time.

Interestingly, I cut a strip of knotweed at the same time as I cut the first goldenrod. The regrown knotweed bloomed quite quickly after the untouched stand. It lasted a little longer, and wasn’t as prolific (to be expected), but the drought didn’t appear to hinder it much (does anything hinder this plant?).

So goldenrod cuts are still a question mark (and clearly highly depending on environment) but knotweed has potential.

Fortunately, this fall cooled down quicker than last year, and I put cozies on my hives toward the end of September. Between the cozies sealing the hives and the lower temps I’ve had much less robbing this fall.